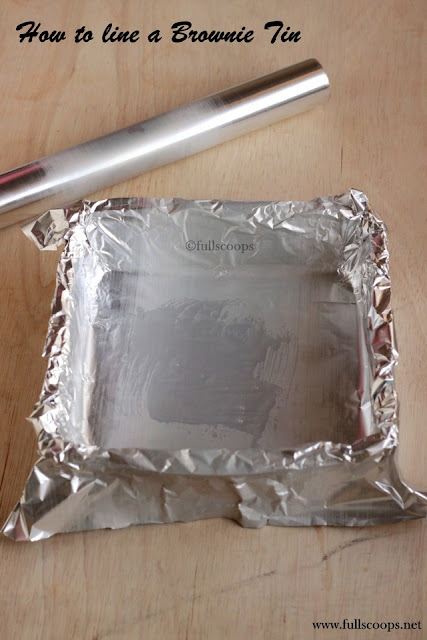
Have you ever had trouble lining a brownie pan and then removing the baked brownies? Brownies tend to get stuck to the pan easily due to the high sugar in the batter and thereby have sticky edges causing them to get stuck.
Whenever I use a butter paper and there are creases, the brownie batter goes into those creases and gets stuck! Once the brownie is baked, I have to sit and peel the butter paper out of those creases! That is something I don't like doing and this method does not pose any such problems.
I bake a lot of brownies and the intensely fudgy ones are my most favorite so this trick has always worked well for me. Also cleaning these pans are so easy since it hardly ever gets dirty!
Do try it out and let me know if it works for you.
HOW TO LINE A BROWNIE PAN EASILY
Preparation time 3 mins
Things required
Method
1. Invert the brownie pan.
2. Take the aluminium foil and go all over the back of the pan and along the sides of the pan and leave a slight extra which will act as handles/flap to help you remove the brownies easily.
3. Press all around so that a square shape is formed. Press gently especially if your foil is flimsy or if your pan has sharp edges.
4. Lift the foil and flip the pan over and place the foil in. It will fit in perfectly. Smooth out the creases.
5. Now take your oil or butter or ghee and grease the bottom and sides of than pan.
6. Once the brownie is baked, you can easily hold the extra edges of the foil (called the over hang) and remove the brownies easily. And look how clean the pan is!
Notes
1. While you place the foil inside the pan, gently smooth out all the creases so that the batter won't stick anywhere.
2. I have not tried this with round pans, if you do try, let me know!
3. Please don't send me mails on the safety of aluminium foils! If you want, follow this idea otherwise simply chuck it!!
Until next time,

Share this post if you found it useful!
Whenever I use a butter paper and there are creases, the brownie batter goes into those creases and gets stuck! Once the brownie is baked, I have to sit and peel the butter paper out of those creases! That is something I don't like doing and this method does not pose any such problems.
I bake a lot of brownies and the intensely fudgy ones are my most favorite so this trick has always worked well for me. Also cleaning these pans are so easy since it hardly ever gets dirty!
Do try it out and let me know if it works for you.
HOW TO LINE A BROWNIE PAN EASILY
Preparation time 3 mins
Things required
- Aluminium foil (preferably a thicker variety)
- Oil / Butter / Ghee / non stick spray
- Pastry brush
1. Invert the brownie pan.
2. Take the aluminium foil and go all over the back of the pan and along the sides of the pan and leave a slight extra which will act as handles/flap to help you remove the brownies easily.
3. Press all around so that a square shape is formed. Press gently especially if your foil is flimsy or if your pan has sharp edges.
4. Lift the foil and flip the pan over and place the foil in. It will fit in perfectly. Smooth out the creases.
5. Now take your oil or butter or ghee and grease the bottom and sides of than pan.
6. Once the brownie is baked, you can easily hold the extra edges of the foil (called the over hang) and remove the brownies easily. And look how clean the pan is!
Notes
1. While you place the foil inside the pan, gently smooth out all the creases so that the batter won't stick anywhere.
2. I have not tried this with round pans, if you do try, let me know!
3. Please don't send me mails on the safety of aluminium foils! If you want, follow this idea otherwise simply chuck it!!
Until next time,


Keep the baking tips again. I sure am learning.
ReplyDeleteGood post dear
ReplyDeleteThis is really good..thanks for sharing
ReplyDeleteOh... that's a nice idea of flipping, will try...
ReplyDeleteThe last tip was best. Lol
ReplyDeletePretty cool! I always have trouble with lining pans. Will try this soon.
ReplyDeleteWhat a great tip. I'll be sure to try this.
ReplyDeletewow beulah it is a worthy info
ReplyDeleteNice useful post, well explanined with pics.
ReplyDeleteExcellent tip wow! Awesome!
ReplyDelete