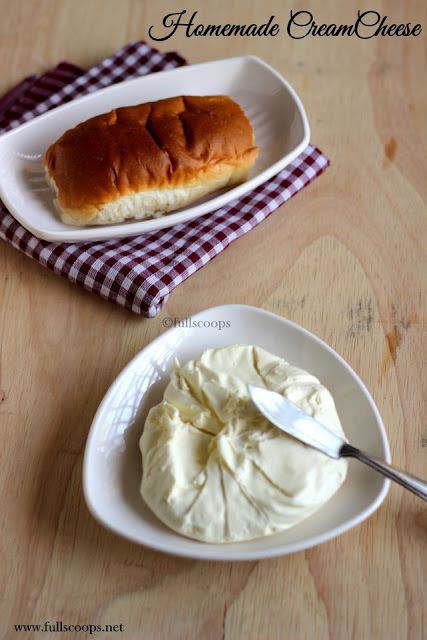
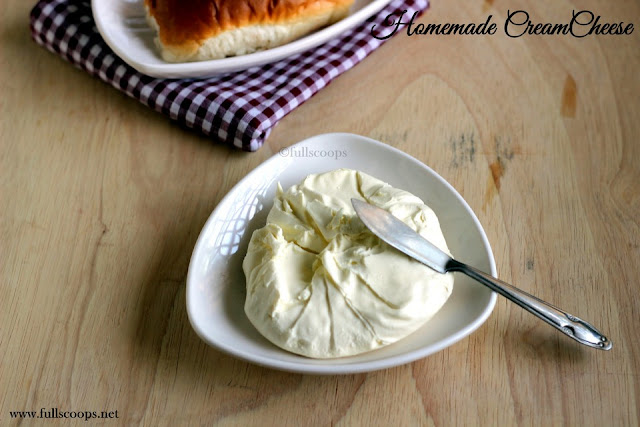
Necessity is the mother of invention!! Although I live in a large metropolitan city, I live in the suburbs and I have never seen a tub of cream cheese in my neighborhood. So, whenever I needed to use cream cheese in a cheesecake recipe, I have always used cottage cheese (paneer) and it always workes very well for me. So I never went about hunting for cream cheese.
But this time, I wanted to bake some cheesecake brownies and I wasn't sure if paneer will work so I made the effort to make the cream cheese at home and I tell you, it is so easy and simple to use that this is what I'm going to make the next time I need cream cheese!
Actually the method to make cream cheese at home needs some culture but this is an alternative and it works well. You can use this cream cheese for your cheesecakes. There are plenty of cream cheese recipes online, I referred many many recipes and this is what worked for me.
HOMEMADE CREAM CHEESE
Preparation time 30 mins | Makes 250 gms
Ingredients
Until next time,

Share this post if you found it useful!
But this time, I wanted to bake some cheesecake brownies and I wasn't sure if paneer will work so I made the effort to make the cream cheese at home and I tell you, it is so easy and simple to use that this is what I'm going to make the next time I need cream cheese!
Actually the method to make cream cheese at home needs some culture but this is an alternative and it works well. You can use this cream cheese for your cheesecakes. There are plenty of cream cheese recipes online, I referred many many recipes and this is what worked for me.
HOMEMADE CREAM CHEESE
Preparation time 30 mins | Makes 250 gms
Ingredients
- Milk - 4.5 cups (about 1L)
- Vinegar - 1 tbsp
To blend
- Fresh cream - 2 tbsp
- Curd (yogurt) - 1/4 cup
Similar Recipes
Method
1. Before starting, take a strainer and place it over a bowl. Place a muslin cloth over the strainer and set aside.
2. Boil milk in a saucepan. When the milk comes to a boil, lower the flame and add the vinegar.
3. Keep stirring as the the milk curdles and the whey separates. This takes only about a minute.
4. Once the whey has completely separated, remove the pan from heat. Do not leave it for long.
5. Pour this over the muslin cloth, so that the cheese gets separated from the whey.
6. Squeeze out the excess whey and transfer it to another vessel. Wash the cheese in running water.
7. Squeeze out the excess water and bring the corners of the muslin cloth together and hang it on the tap for 15 minutes for the water to drain.
8. Then add the cheese to a blender and add the 1/4 cup of curd and 2 tbsp of cream and blend till it's a smooth.
9. Transfer it back to the muslin cloth and tie the edges again and place the cloth over the strainer with a bowl underneath.
10. Keep this refrigerated for about 5 hours until all the excess water drips out. If you find a lot of water dripping then keep the set up for 8 hours. I only had about a tsp of drained water.
11. Keep the set up outside at room temperature for 2 hours and then refrigerate for the remaining 3 hours.
Your homemade cream cheese is ready!!
Notes
1. The amount of cheese you get depends on the fat content of the milk you use.
2. You can use curd/ lemon juice or vinegar to curdle the milk.
3. If you used curd (yogurt) to curdle the milk you need not wash the separated cheese.
4. If using curd to curdle the milk, use 1/4 cup and use homemade curd rather that store bought curd. I find that the store bought curd does not curdle the milk as well as homemade ones which are slightly sour in nature.
4. If your milk hasn't curdled with 1/4 cup curd, you can add another 1/4 cup.
5. Vinegar curdles the milk instantly but you have to wash the separated cheese to remove the smell and taste of vinegar.
6. You can use 1 tbsp lemon juice too. And you will have to wash the cheese in running water.
7. Use the right size jar while blending the separated cheese with cream and yogurt. I used a larger one initially but I was not able to blend so had to transfer to a smaller jar.
8. You can use a muslin cloth, or thin kitchen towel, or cheesecloth. I use a thin clean veshti thunni (dhothi cloth)
9. If you find it difficult to blend the cheese with curd and cream, then add a tsp of the whey water and then blend.
10. Keep the whey water and use it in cooking. It is very healthy, full of nutrition.
2. Boil milk in a saucepan. When the milk comes to a boil, lower the flame and add the vinegar.
3. Keep stirring as the the milk curdles and the whey separates. This takes only about a minute.
4. Once the whey has completely separated, remove the pan from heat. Do not leave it for long.
5. Pour this over the muslin cloth, so that the cheese gets separated from the whey.
6. Squeeze out the excess whey and transfer it to another vessel. Wash the cheese in running water.
8. Then add the cheese to a blender and add the 1/4 cup of curd and 2 tbsp of cream and blend till it's a smooth.
9. Transfer it back to the muslin cloth and tie the edges again and place the cloth over the strainer with a bowl underneath.
10. Keep this refrigerated for about 5 hours until all the excess water drips out. If you find a lot of water dripping then keep the set up for 8 hours. I only had about a tsp of drained water.
11. Keep the set up outside at room temperature for 2 hours and then refrigerate for the remaining 3 hours.
Your homemade cream cheese is ready!!
Notes
1. The amount of cheese you get depends on the fat content of the milk you use.
2. You can use curd/ lemon juice or vinegar to curdle the milk.
3. If you used curd (yogurt) to curdle the milk you need not wash the separated cheese.
4. If using curd to curdle the milk, use 1/4 cup and use homemade curd rather that store bought curd. I find that the store bought curd does not curdle the milk as well as homemade ones which are slightly sour in nature.
4. If your milk hasn't curdled with 1/4 cup curd, you can add another 1/4 cup.
5. Vinegar curdles the milk instantly but you have to wash the separated cheese to remove the smell and taste of vinegar.
6. You can use 1 tbsp lemon juice too. And you will have to wash the cheese in running water.
7. Use the right size jar while blending the separated cheese with cream and yogurt. I used a larger one initially but I was not able to blend so had to transfer to a smaller jar.
8. You can use a muslin cloth, or thin kitchen towel, or cheesecloth. I use a thin clean veshti thunni (dhothi cloth)
9. If you find it difficult to blend the cheese with curd and cream, then add a tsp of the whey water and then blend.
10. Keep the whey water and use it in cooking. It is very healthy, full of nutrition.
Until next time,


Homemade cream cheese looks delicious. Super yummy :)
ReplyDeletevery useful post dear
ReplyDeleteI have made mascarpone but never made cream cheese ...looks superb dear..useful post ..
ReplyDeleteWow... that's a super post! Just like you said, since I get to buy cream cheese, never considered making it...
ReplyDeleteJust perfect! looks adorable...
ReplyDeleteFirstly will say thank u so much for amazing recipe as I m new in baking n thinking to buy cream cheese for making cream cheese cake.. N then I got ur recipe so thought will make at home only.. Pls dear tell me can we use AMUL FRESH CREAM?? "ur response will definitely boost up me. ☺
ReplyDeleteHi Noopur, thank you so much for your comment! Yes you can use amul fresh cream. I also used amul fresh cream only!
DeleteThxx alot dear.. ☺
ReplyDeleteAs always an excellent post. I have one doubt Do we need to add any salt? The store bought ones have a little salty taste, so wanted to clarify Thanks
ReplyDeleteThank you Prathima! Using salt is optional. You can add if you want but I don't add salt to the cream cheese I make.
Delete